


So you have gathered every document you have for your elusive brick-wall ancestor. You have re-examined every detail and clue. What do you do next? You make a timeline! Let’s keep busting genealogy brick walls with Step 2 – Make a Timeline starting now.
Watch This Episode, or Continue Reading Below
This post is part two of a multi-part series on how to bust through genealogy brick walls and discover the identity and life story of even your toughest, elusive ancestor. If you missed Step 1 – Review Previous Research, catch that here.
Create a Timeline
Using the report we created for this brick wall ancestor in Step 1, we are now going to rearrange the information into a chronological timeline. This helps us in a few ways.
- First, our minds often pick up on different clues and gaps in our research when we arrange the data in a new way.
- Second, many of the documents we have for this ancestor actually give us information about more than one event or time period.
The timeline will help us see everything more clearly.
What to Include on the Timeline
Include EVERY. SINGLE. THING. on the timeline.
- Obvious dates such as birth, marriage, death
- Calculated dates from ages given on documents
- Extended family members’ dates
- Military service dates
- Dates of residence in a certain location: found on tax, land, census and other documents
- Duplicated dates: multiple “facts” for birth, etc. Don’t select the “right date” at this stage. Simply list them all.
Multiple Dates Per Document
Most documents you examined more closely in Step 1 will give you several dates.
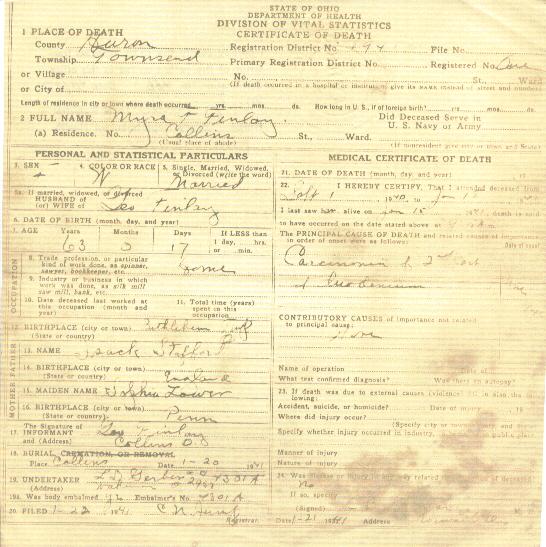
For example, a death certificate will obviously include the death date and place. But, it will also give you a birth date (actual or calculated), a date of burial, and a date that the final illness began. Include all of these dates on the timeline.
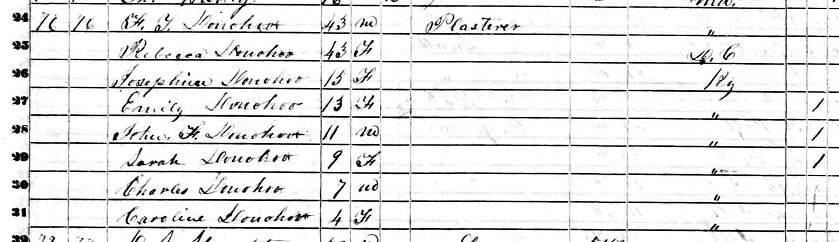
A census household will give a date and place of residence. It may also give each family member’s birth date and place, and perhaps an approximate marriage date. Each of these items receive a separate entry on the timeline.
Do Not Make Selections Yet
Do not exclude anything from the timeline or make selections about anything at this point in the Genealogy Brick Wall Busting Process.
- If you have conflicting dates and places, let them exist on the timeline together for now.
- If the ancestor has impossibly multiple marriages, put them on the timeline for now
- If there are wild variations of birthplaces and dates, put every single one on the timeline for now
Let your timeline be messy. Your brain will want to tidy it up by combining and making just one birthdate or place, but this is where we get ourselves tangled up and build our own brick walls!
Let the timeline be messy so you can visually see where the tangled knots are, where the discrepancies are, where the holes are.
We often have to let our research process get messy before we can see clearly to make it tidy again.
Trust me… we will work on tidying everything up in a future step of the process!
Timeline Format Options
There are several formats you can use to create your timeline. The choice is yours! It really depends on what works best for you. There is no right or wrong way to create a timeline.
The keys to creating a useful timeline are:
- to include the date, place, event, person, and other pertinent details with each entry.
- to keep the source citation (that you created in Step 1) with each timeline entry. So, if your document created multiple entries on the timeline, the citation should be attached to each entry.
- to keep entries from different documents separate from each other. For example, if one census gives a calculated birth date of 1802 in New York and another census states 1805 in Massachusetts, those should be separate entries on the timeline.
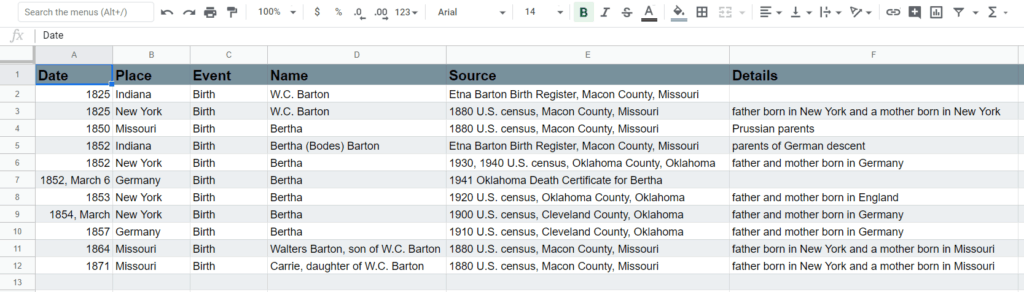
Spreadsheet
If you generally enjoy using spreadsheet programs such as Excel or Google Sheets to organize information, then this format might be just right for your timeline. Create column headings for date, place, event, person, citation, and details. Additional rows can easily be added where new events need to be inserted.
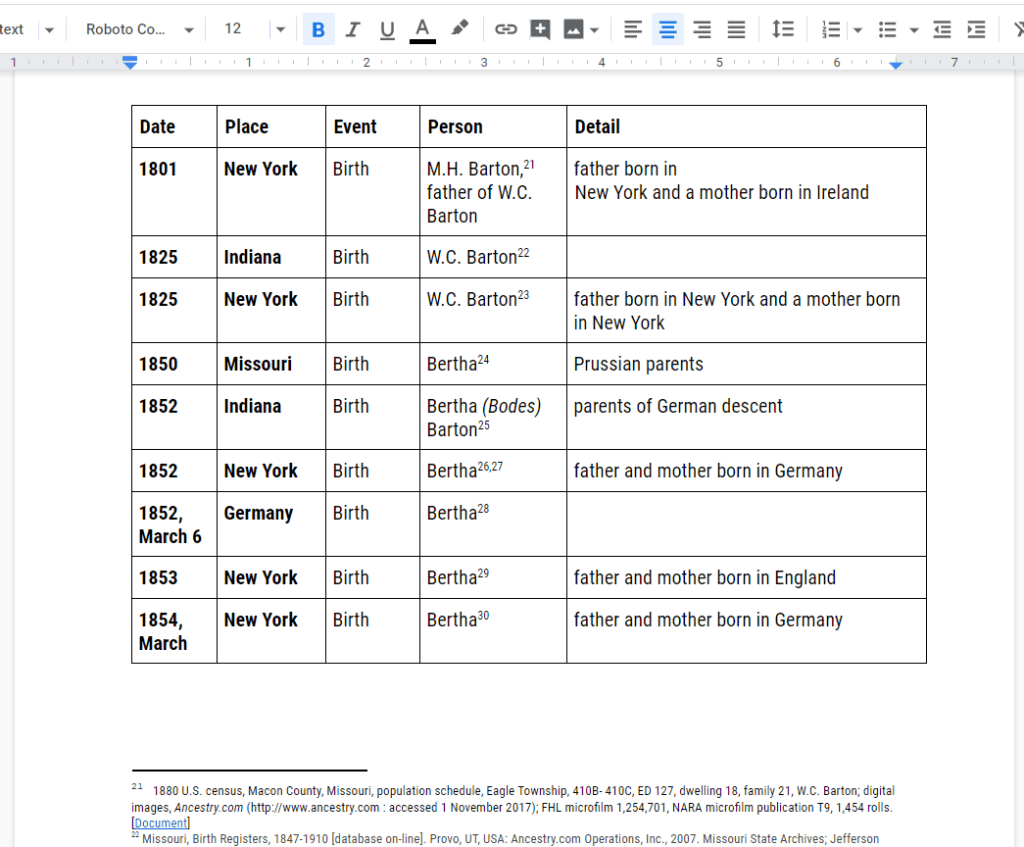
Word Document Table
If you regularly use the table feature in your word processing documents to organize information, then the table format may be great for your timeline. Similar to the spreadsheet format, create column headings for date, place, event, person, citation, and details. The table format allows citations to be added as footnotes in each entry.
Basic Word Document
If you’d like to keep things easy for your timeline, you can simply open a fresh word processing document and use regular formatting for your timeline. This format lends itself most easily to copying and pasting entries from your Step 1 report into this chronological arrangement. The footnote citations will also copy over with the entries, saving you an extra step.

Keep Working Through
Work your way through the entire report from Step 1 to create the timeline for step 2. Don’t overlook any event that could go on the timeline. Join me here again next time to see how this step looks in the case study of Brick Wall Bertha. Then I will see you again in a few weeks to work on Step 3 of the Genealogy Brick Wall Busting Process!
Pin For Later


See you next time,
Melissa
